How to Make a Paper Animation From Any Image (Free Guide)
Learn how to make a paper animation online with our free paper animator tool. Transform photos into animated paper cut-outs with realistic texture, motion, and export options. No sign-up required.
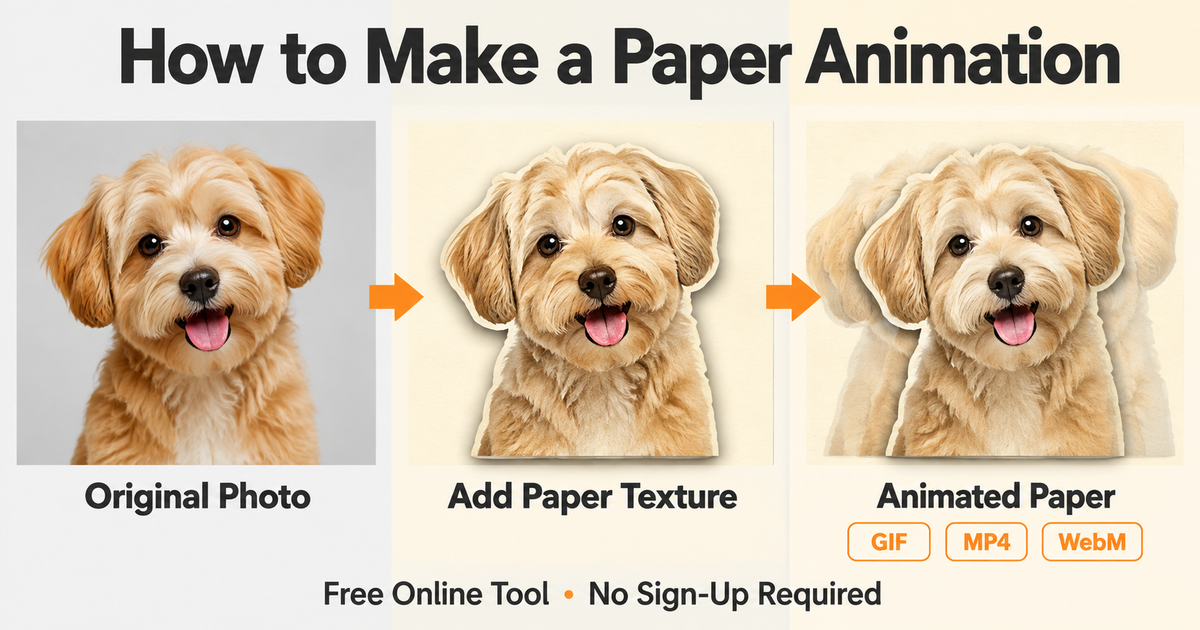
Paper animation brings still images to life by turning them into moving paper cut-outs with realistic texture, flutter effects, and hand-crafted motion. Unlike traditional animation that requires drawing every frame by hand, modern paper animation tools let you transform any photo or illustration into an animated paper piece in minutes.
This comprehensive guide covers everything you need to know about making paper animations: from understanding what paper animation is and why it works, to step-by-step instructions for creating your own, to advanced techniques for getting professional results.
If the source is a photograph — a portrait, product shot, or pet — start with the paper animation from photo workflow. This page is the general method for any image.
What is paper animation?
Paper animation is a style of motion graphics that simulates the look and movement of physical paper cut-outs. The technique originated from stop-motion animation where artists would photograph paper shapes frame by frame, but digital paper animation recreates this effect entirely in software.
The key characteristics that define paper animation include:
- Paper texture and material qualities — the surface shows visible paper grain, subtle shadows, and sometimes creases or imperfections that make it read as a physical material rather than a flat digital image.
- Layered depth — elements sit at different distances from the camera, creating parallax and dimension when they move.
- Flutter and float motion — the animated paper doesn't just slide across the screen; it wobbles, rotates slightly, and moves in a way that suggests weight and air resistance.
- Cut-out aesthetic — clean edges define each paper shape, often with a subtle white border or slight thickness that reinforces the paper-craft look.
Paper animation is especially popular for social media content, explainer videos, stickers, profile pictures, and anywhere you want motion that feels warm, hand-made, and approachable rather than slick and corporate.
Why paper animation works for visual storytelling
Paper animation occupies a unique position in the spectrum of motion styles. It's more dynamic than a still image but less demanding than full character animation. Here's why creators choose it:
It's immediately recognizable
The paper cut-out aesthetic has strong associations with craft, education, and indie storytelling. When someone sees paper animation, they instantly recognize the style and bring those associations with them. This makes it an excellent choice for content that wants to feel personal, creative, or nostalgic.
It bridges illustration and motion
If you already have illustrations, photos, or graphic design assets, paper animation is one of the fastest paths to adding motion. You don't need to redraw anything or create new artwork — the existing image becomes the animated element.
It handles imperfection gracefully
Traditional smooth animation can look wrong if the motion isn't perfectly polished. Paper animation embraces a little wobble, a little drift, a little irregularity. That tolerance for imperfection means you can get good results faster without needing to be an animation expert.
It scales from simple to complex
A basic paper animation might be one image floating gently against a background. A complex one might involve multiple layers moving independently with carefully choreographed depth and timing. You can start simple and add sophistication as your skills grow.
What you need to make a paper animation
The barrier to entry is deliberately low:
- One image — PNG, JPEG, or WebP. This could be a photo, a drawing, a logo, a character illustration, or any visual you want to animate.
- A browser — desktop or mobile. No software installation required.
- A few minutes — once you understand the workflow, creating a basic paper animation takes two to five minutes.
You don't need an account, you don't need animation experience, and you don't need specialized hardware. If you want to practice before committing your own artwork, most paper animation tools provide sample images so you can walk through the entire process first.
How to make a paper animation: step-by-step
This walkthrough uses a browser-based paper animator tool, but the core concepts apply to any paper animation workflow.
Step 1 — Upload your image
Open the Paper Animator tool and upload your image, or click to try a sample image if you want to preview the workflow first.
Choosing the right source image:
- High contrast subjects work best. A clear silhouette or a subject that stands out from its background will give you the cleanest cut-out.
- Central composition keeps the animated element visible and prevents edge clipping.
- Appropriate resolution — anywhere from 800px to 4096px on the longest edge is ideal. Smaller images may look pixelated when animated; very large images may slow down preview rendering.
If your image has a complex or cluttered background and you want to animate only the main subject, you'll have an easier time if you remove the background first or use the subject cut-out mode.
Step 2 — Choose your paper animation mode
Modern paper animator tools typically offer two main approaches:
Full paper sheet mode
The entire image is treated as a single piece of paper. This mode works well when:
- Your image already has a transparent background or simple solid background
- You want the whole composition to move together as one paper cut-out
- You're working with logos, icons, illustrations, or graphic designs
In this mode, the tool applies paper texture across the entire image and animates it as one cohesive piece.
Subject cut-out mode
The tool automatically detects and isolates the main subject from the background. This mode is ideal for:
- Photos with busy backgrounds where you only want the person or object to animate
- Portrait photos where you want the face or figure to become a paper cut-out
- Product photos where the background should disappear
Subject detection uses background removal AI to separate the foreground from everything behind it. The isolated subject becomes your animated paper element, usually on a transparent or solid background.
Which mode should you choose?
- If your image is already a clean illustration on a transparent background, use full paper sheet.
- If you're working from a photo and want only the main subject, use subject cut-out.
- Not sure? Try both and preview the difference.
Step 3 — Adjust paper texture and appearance
Once your image is loaded, you can control how it looks as paper:
Paper texture intensity — how visible the paper grain and surface detail are. A higher value makes the material read more obviously as paper rather than a flat print. Start around 60-70% for most images.
Paper color tone — some tools let you adjust the warmth or coolness of the paper base. A slightly warm tone (subtle cream or ivory) often looks more natural than pure white.
Edge style — clean cut edges versus slightly rough or torn edges. Clean works for modern illustrations; rough edges work for a more hand-crafted feel.
Shadow and depth — subtle drop shadows or edge shadows help the paper feel like it's lifted off the background. Keep shadows soft; hard shadows tend to look artificial.
These adjustments are mostly aesthetic. You're establishing the material quality before you add motion.
Step 4 — Set the animation motion
This is where your still image becomes animated paper. The motion parameters control how the paper moves:
Motion type
Most paper animators offer several motion presets:
- Flutter — gentle side-to-side wobble with slight rotation, as if the paper is hanging and a breeze passes by.
- Float — slow vertical drift with very soft horizontal sway, suggesting the paper is suspended in air or water.
- Bounce — a more energetic up-and-down motion with settling, like the paper was dropped and is coming to rest.
- Spin — continuous rotation, either subtle or pronounced.
- Custom path — some tools let you drag to define your own motion path, which the paper then follows in a loop.
Start with a preset that matches the mood you want, then fine-tune from there.
Motion strength
How far the paper travels during its motion cycle. A low strength gives you a subtle shimmer; a high strength produces a more exaggerated, playful movement.
For most use cases, subtle motion reads as elegant, while strong motion reads as playful or comedic. Match the strength to your content's tone.
Motion speed
How fast the animation cycle runs. Slower speed feels calmer and more contemplative; faster speed adds energy and urgency.
A good starting point is a 3-5 second loop for most content. Shorter loops can feel repetitive; longer loops may take too long to establish the pattern.
Motion variation
How much randomness or irregularity is introduced into the motion. Zero variation gives you perfectly mechanical, predictable movement. Higher variation makes each cycle slightly different, which can feel more organic but may also make the loop seam more obvious.
Step 5 — Preview and refine
Hit preview and watch your paper animation loop. You're checking for:
- Does the motion feel right? Too much or too little? Too fast or too slow?
- Does the loop restart smoothly? If there's a visible jump when it cycles back to the beginning, adjust the motion speed or duration.
- Does the paper texture look believable? If it reads as a flat image rather than paper, increase texture intensity or check that shadows are enabled.
- Is the subject clearly visible throughout the motion? If parts of it move off-screen or become obscured, you may need to adjust framing or reduce motion strength.
Iterate on the settings until the preview matches what you imagine. Most tools let you adjust parameters and see the result immediately without re-uploading.
Step 6 — Choose export settings
When you're happy with the preview, set your export options:
Format
- GIF — maximum compatibility, plays everywhere, but larger file sizes. Best for sharing on social media, messaging apps, or anywhere you need guaranteed playback.
- MP4 — smaller file size than GIF, widely supported, good for video editing or embedding in web pages. Requires browser encoder support.
- WebM — often the smallest file size for the same quality, but less universal compatibility. Use when you control the destination and know WebM is supported.
Quick decision rule: GIF for social sharing, MP4 for editing or embedding, WebM for web-native contexts where file size matters.
Output size
The pixel dimensions of your exported animation. Common presets:
- 480px — small, fast to load, good for thumbnails, avatars, or mobile messaging.
- 720px — general-purpose size, balances quality and file size well.
- 1200px — high resolution for cases where detail matters or the animation will be displayed large.
Larger output sizes produce sharper results but also larger files. For most social media and web use, 720px is the sweet spot.
Duration
How long the animation runs before looping. You can usually choose anywhere from 1 to 10 seconds.
- 1-2 seconds — very short, good for reaction images or icon animations.
- 3-5 seconds — most versatile, long enough to show the motion pattern without feeling slow.
- 6-10 seconds — use when you want a more ambient, contemplative loop or when the motion needs more time to complete its cycle.
Shorter durations mean smaller file sizes. If file size is a concern, start with a 3-second loop.
Background
- Transparent — the paper element animates on an alpha channel, so you can composite it over other content later.
- Solid color — choose a background color that matches your destination. White, black, or a brand color are common choices.
- Keep original — if your source image had a background, this option preserves it.
Transparent is the most flexible because you can always add a background later, but not all formats support transparency (GIF does, MP4 usually doesn't).
Step 7 — Export and download
Click the export button and wait while your browser generates the animation. The encoding happens locally in your browser tab — nothing is uploaded.
For GIF exports, the tool renders each frame and encodes them into a single GIF file. This can take 10 to 60 seconds depending on duration, size, and your device's performance.
For MP4 or WebM, the browser's video encoder does the work, which is usually faster but depends on your browser's support for those codecs.
When encoding finishes, the file downloads automatically. You now have an animated paper cut-out ready to use.
Advanced paper animation techniques
Once you're comfortable with the basic workflow, these techniques let you create more sophisticated results.
Layered depth and parallax
Instead of animating one flat piece of paper, you can create the illusion of multiple layers at different depths:
- Separate your image into foreground, midground, and background elements (either manually in an image editor, or by using the cut-out tool multiple times).
- Animate each layer with slightly different motion parameters.
- The foreground moves more than the background, creating parallax — the sense that the camera or viewer is moving through a scene with depth.
This technique is what separates a simple paper animation from a polished, dimensional one.
Matching motion to content type
Different subjects benefit from different motion styles:
- Portraits and faces — gentle float or very subtle flutter. People look unnatural if they bounce too energetically.
- Characters and mascots — can handle more playful motion. A light bounce or energetic flutter reinforces personality.
- Logos and brand elements — usually best with minimal motion. A slow float or very subtle flutter keeps it professional.
- Illustrations and stickers — this is where you can push the motion. Strong flutter, exaggerated bounce, or spin all work depending on the style.
- Text and typography — treat it like a logo; keep motion restrained so readability isn't compromised.
Golden rule: when in doubt, go subtle. You can always increase motion strength, but overly aggressive animation is hard to pull back once exported.
Combining paper animation with other effects
Paper animation pairs well with:
- Particle effects — subtle floating particles around your animated paper enhance the dreamy or magical feel.
- Background motion — a slow gradient shift or gentle color animation in the background layer makes the paper stand out more.
- Sound design — adding a gentle whoosh, rustle, or ambient tone reinforces the paper materiality even though paper animations are usually silent.
If you're exporting for video editing, consider exporting with a transparent background so you can composite the paper animation over other footage.
Creating paper animation sequences
For longer content, you might want multiple paper elements that animate in sequence:
- Create each paper animation as a separate export.
- Import them all into a video editor.
- Stagger their timing so they appear one after another, or overlap them for a collage effect.
- Add transitions (fade, slide, scale) between paper elements.
This approach lets you build explainer videos, social media stories, or short branded films entirely from paper animation assets.
Troubleshooting common paper animation issues
The paper doesn't look like paper
Problem: The animation looks like a flat image floating around, not paper.
Solutions:
- Increase paper texture intensity so the surface grain is more visible.
- Enable shadows if they're turned off.
- Check that your output format supports transparency if you're trying to show the paper lifted off a background.
- Add a very subtle edge highlight or border to reinforce the cut-out quality.
The motion looks jerky or unnatural
Problem: The paper moves in a robotic, stiff way instead of flowing naturally.
Solutions:
- Increase motion variation so each loop cycle is slightly different.
- Try a different motion preset; some are inherently smoother than others.
- Reduce motion speed; fast motion exaggerates any stiffness.
- If the jerkiness happens specifically at the loop restart, adjust the duration or enable motion easing.
The file size is too large
Problem: Your GIF is 10 MB or 20 MB and won't upload to your destination.
Solutions:
- Export at a smaller size (480px instead of 1200px).
- Reduce duration (2 seconds instead of 5 seconds).
- Switch to MP4 or WebM if your destination supports video.
- If you must use GIF, try reducing the frame rate or color palette, if your tool offers those options.
The background removal cut out too much or too little
Problem: In subject cut-out mode, the AI removed part of your subject or left too much background.
Solutions:
- Switch to full paper sheet mode and manually remove the background in an image editor before uploading.
- Try a different source image with clearer subject/background separation.
- Some advanced tools let you manually refine the cut-out; look for "refine edge" or "manual mask" options.
The animation looks blurry
Problem: The exported animation is soft or pixelated compared to your source image.
Solutions:
- Export at a larger size (720px or 1200px).
- Check your source image resolution; if it's only 400px to begin with, no export setting will make it sharp.
- For GIF, some tools offer quality settings; make sure you're not on a "low quality" preset.
- MP4 and WebM usually stay sharper than GIF at the same resolution.
Paper animation for different platforms
Each platform has its own preferences and constraints:
Social media (Instagram, TikTok, Twitter, Facebook)
- Format: GIF or MP4
- Size: 720px or 1080px
- Duration: 3-6 seconds
- Tips: Use bold motion that reads clearly even on a phone screen. Vertical or square formats often perform better than landscape.
Messaging apps (WhatsApp, Telegram, Discord, Slack)
- Format: GIF (for maximum compatibility)
- Size: 480px (keeps file size down)
- Duration: 1-3 seconds (shorter loops are more chat-friendly)
- Tips: Keep file size under 2 MB if possible; many apps compress or reject large GIFs.
Website embeds
- Format: MP4 or WebM
- Size: 720px or 1200px
- Duration: 3-10 seconds
- Tips: Use
autoplay loop muted playsinlineattributes for background motion. Transparent background (WebM with alpha) lets the paper composite over page content.
Video editing (Premiere, Final Cut, DaVinci Resolve)
- Format: MP4 with transparency (ProRes 4444 if available), or WebM
- Size: Match your project resolution (1080p or 4K)
- Duration: As long as you need
- Tips: Export with the highest quality settings your tool offers; you can always compress later. Transparent background gives you maximum flexibility for compositing.
Does paper animation respect privacy and copyright?
Privacy
If you're using a browser-based paper animator tool, the image processing usually happens entirely in your browser tab with no upload. That means:
- Your photo never leaves your device during the animation process.
- There's no server-side storage or account database holding your images.
- Closing the browser tab clears the working data.
This makes paper animation tools safe for personal photos, unpublished artwork, client work, or anything else you wouldn't want to upload to a cloud service.
Always check the specific tool's privacy policy, but reputable browser-based animators do not upload or store your images.
Copyright
The paper animation tool itself doesn't add copyright restrictions, but you still need the rights to the source image:
- Your own photos or artwork: You can animate them freely.
- Licensed stock images: Check the license terms; most allow derivative works like animations, but some may prohibit it.
- Other people's copyrighted work: You need permission. Animating someone else's illustration without permission creates an unauthorized derivative work.
- Fair use: In some jurisdictions, very short clips used for commentary, parody, or education may qualify as fair use, but this is context-dependent and legally complex.
When in doubt, use your own images or properly licensed stock.
Next steps: from paper animation to animated storytelling
Paper animation is often a gateway to broader motion design skills:
- Learn layering and composition by creating multi-element paper scenes with depth.
- Experiment with timing and pacing by building sequences where multiple paper elements animate in choreographed order.
- Explore other animation styles like wobble effects, morphing, or kinetic typography, which share technical foundations with paper animation.
- Build a portfolio of paper-animated content for social media, and use analytics to learn what motion styles resonate with your audience.
If you're creating content for a brand, paper animation is especially powerful for:
- Animated logos and brand marks
- Social media story templates
- Explainer video elements
- Product launch teasers
- Educational content that benefits from a hand-crafted, approachable aesthetic
Common questions about paper animation
How long does it take to make a paper animation?
Once you're familiar with the workflow: 2 to 5 minutes for a simple animation, 10 to 20 minutes if you're iterating on motion parameters or working with multiple layers.
Can I make paper animation on my phone?
Yes, if you're using a browser-based tool. The workflow is the same, though a larger screen makes it easier to preview details.
Do I need animation or design experience?
No. The tool handles the technical animation work. You make creative decisions (which motion, how strong, how long), but you don't need to understand keyframes, easing curves, or animation principles.
What's the difference between paper animation and motion graphics?
Motion graphics is the broad category that includes paper animation, kinetic typography, animated infographics, and more. Paper animation is a specific aesthetic within motion graphics that mimics paper cut-outs.
Can I use paper animation for commercial projects?
Yes, as long as you have the rights to the source image. The animation tool itself doesn't impose licensing restrictions. Check whether the specific tool you use adds watermarks or requires attribution.
Why does my animation look different in the preview versus the export?
Preview often runs at a lower frame rate or resolution to keep playback smooth. The export renders at full quality, which may reveal details or motion nuances that were smoothed over in the preview.
Make your first paper animation now
The fastest way to understand paper animation is to try it.
Open the Paper Animator tool, load a sample image, and walk through the workflow once. You'll have an animated result in under five minutes.
Then upload your own image and see how different photos, illustrations, and graphics respond to paper animation. The technique is forgiving, the results are immediately shareable, and the creative possibilities are wide open.
Whether you're building content for social media, adding motion to a design portfolio, creating assets for video projects, or just exploring what's possible with a still image and a few motion parameters, paper animation gives you a direct path from static to dynamic.
Start simple, experiment often, and watch how a little motion transforms the way people engage with your visuals.